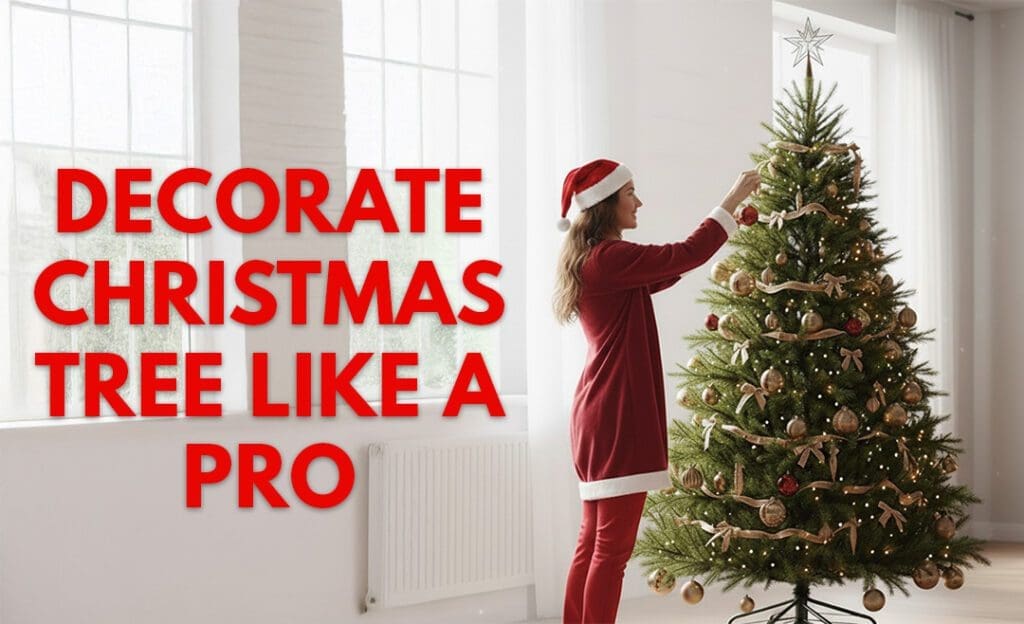
How to Decorate Your Christmas Tree Like a Pro: 7 Steps
Decorating a Christmas tree can indeed be a joyous yet overwhelming adventure, given the array of styles to choose from. It presents a wonderful chance to showcase your creativity and make your holiday celebrations even more special.
This enchanting tradition traces back to 1510 when the first Christmas tree was adorned in Riga, Latvia. By the 1500s and 1600s, the Germans popularized the practice, paving the way for American customs by the 1800s. Before trees took centre stage, families used to hang evergreen branches over doors and windows to warmly welcome the festive season.
As we prepare to decorate our Christmas trees, let’s explore the tradition, history, and discover creative ways to make your trees look full and beautiful!
Must-Have Christmas Tree Decorations
If your Christmas tree looks merely “fine,” it might lack attention. Stunning trees, like those in hotels and magazines, require the right order and methods, not just more decorations. Here are the must-have Christmas tree decorations to give your tree a WOW look!
- Lights: A top choice for any tree, whether it’s faux or real.
- Ornaments: Available in many colors, shapes, and types to fit your style.
- Garland: An affordable way to enhance your tree’s appearance.
- Ribbon: Select the perfect ribbon to complement your Christmas tree.
- Tree Skirts: Skirts add texture and warmth to your space.
- Presents: Adds visual impact and finishes your holiday shopping early.

The 7-Step Pro Method for Decorating a Luxurious Christmas Tree
Step 1: Make the tree look fluffy
This is the biggest difference between a “meh” tree and a wow tree.
Fluffing instantly adds 40% more volume to your tree.
- Pull every branch up, out, and sideways
- Fan the tips so they resemble a peacock feather
- Fill empty gaps with extra greenery, pine picks, or old branches
- Step back, adjust, repeat
Florist Tip
- Layer textures (mix pine, eucalyptus, berries, and branches)
- Add Florals like white hydrangeas, peonies, in winter tones, poinsettias, to softness and volume
- Fill gaps with greenery first, not ornaments
- Use odd-number groupings (3, 5, 7) for a balanced look, such as clusters of 3 ornaments or 5 berry picks and 7 floral stems, like that
Step 2 Lights: The “Zigzag” Method Pros Don’t Want You to Know
If you find that your tree appears somewhat flat, you might consider weaving the lights in a zig-zag pattern from the top to the bottom. This approach offers several advantages, including:
- A warm glow that seems to emanate from within
- More efficient use of lights
- A beautifully layered appearance
- Easier removal when the holiday season has concluded
- For a 7 ft tree → 600–1,000 lights
- 9 ft tree → 1,200–1,800 lights
Florist Tip
- 1. Start From the Inside Out
Begin by placing a strand deep in the tree’s center for depth, then work outward.
- Highlight Focal Areas
Enhance key elements by adding extra light around statement ornaments, ribbon clusters, or the topper to draw attention upward.
Step 3. Ribbon: The Step That Instantly Makes Your Tree Look Expensive
The hallmark of a professionally decorated tree is the ribbon. Instead of tightly wrapping the ribbon around the tree, it is recommended to cut it into 2 to 3-foot pieces, and the ends should be tucked deep within the branches, while loops are pulled out to create a cascading effect, which enhances the flow, depth, and overall richness of the tree’s appearance. To achieve a high-end look, use two ribbons layered together—one with a textured finish and one with a patterned design. Always choose wired ribbon so it keeps its shape.
Florist Tip
- Use Ribbon Like “Flowing Stems.”
Allow some ribbon to cascade freely while others dip deeper into the branches, creating a natural flow and an organic, designer feel.
- Build Mini Ribbon Bouquets
Create clusters of 2–3 short ribbon pieces and tuck them into key spots on the tree for added fullness, texture, and visual interest.
Step 4. Add Large Ornaments First
When decorating your tree, choose your ornaments carefully. Small ornaments can make it look messy, while larger ones add elegance.
Use large decorations, such as large baubles or snowflakes, and place them deeper in the branches to create depth.
Florist Tips
- Anchor Large Ornaments Deep Inside
Use large ornaments as “focal flowers” near the trunk to create shadows and fullness, then add medium and small pieces outward.
- Use Colour Gradients, Not Random Placement
Use the technique of blending colours from light to dark with ornaments to create a soft, flowing colour story, rather than harsh patches.
- Mix Unexpected Textures
Mix matte with glossy, velvet with glitter, and ribbed with smooth to create a more interesting and layered look for your tree.

Step 5: Medium + Small Ornaments for Texture and Sparkle
Place medium ornaments in the middle of the tree. Use small ornaments to add sparkle to the tips. Step back every few minutes to check and adjust the arrangement.
Florist Tip
- Use Them Like “Fillers” in a Bouquet
Use medium and small ornaments, such as baby’s breath or mini blooms, to fill gaps and soften sharp lines, helping to create a full, seamless look.
- Create Light-Reflecting Triangles
Place small reflective ornaments, such as glitter, glass, or pearlescent ones, in triangular patterns around the tree to bounce light evenly and imitate how florists spread shimmer in their arrangements.
Step 6. Add Picks, Stems & Florals
To elevate your tree from “homey” to designer, use luxury elements like berry stems, magnolia leaves, pine picks, glitter twigs, poinsettias, and champagne branches. Arrange them like fireworks around the tree to enhance its silhouette and add drama.
Florist Tip
- Fan Them Out Like a Bouquet Spray
The angle of the branches extends outward from the tree, resembling a flower, which makes the shape wider and adds a sense of movement.
- Group in Mini Trios
Mix a berry pick, a leafy stem, and a glitter twig to create a mini arrangement that looks full and stylish.
Step 7. An Oversized Topper (No More Tiny Stars!)
Choose a meaningful tree topper for your Christmas tree; it should be a focal point, not an afterthought.
- A big, eye-catching bow
- Colorful ribbons
- A striking angel figure
- A modern metal starburst
- A sculptural LED topper for extra light
- A cluster of decorative picks for added texture
Also, leave at least 6 inches of space between the topper and the ceiling. This helps create a balanced and attractive look. By following these tips, your tree will look beautifully decorated and impressive.
Florist Tip
- Floral Crown Style
Layer ribbon loops, tall stems, and a focal ornament for a full, sculpted look.
- Angle for Movement:
Place the picks and ribbons outward to create a light and dynamic look.
- Balance Height and Width
Add horizontal or diagonal stems for visual balance and a finished look on top of the tree.

How to Make Your Christmas Tree Look Fuller (Quick Fixes)?
- Wrap extra garland around the trunk.
- Use layered ribbon in 3 to 5 areas.
- Tuck in eucalyptus, berries, or flowers.
- Place oversized ornaments closer to the center.
- Shape the branches in a V-pattern.
- Mix different finishes like matte, shiny, and glitter.
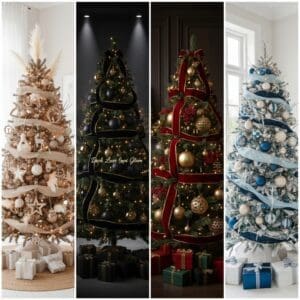
Unique Christmas Tree Looks for 2025–2026
- Scandinavian Calm
If you plan to create a calming Christmas tree, use soft neutral colors, beige linen ribbon, and wooden ornaments. Add pampas stems and warm white lights to create a light, natural feel that is inviting and serene.
- Dark Luxe Glam
Use black velvet ribbon with gold accents and matte black ornaments for a striking holiday look. This bold style looks beautiful at night and makes your home feel luxurious.
- Royal Red & Gold
Deep red velvet ribbon and shiny gold ornaments create a classic Christmas style. This look feels rich and nostalgic, making it perfect for those who enjoy an elegant traditional holiday.
- Modern Coastal Blue
This tree features navy, champagne, and pearl-inspired ornaments for a fresh, breezy style. The crystal picks sparkle like the ocean, creating a modern and calm look that brightens any space.
Conclusion
Decorating your Christmas tree like a pro doesn’t have to be expensive—focus on fullness, flow, and that magical “wow” factor. With thoughtful placement, your tree can become a stunning centerpiece. Use these professional techniques to achieve a fuller, richer look that will impress your guests. Trust the process and watch your tree transform into a holiday showstopper!
Christmas tree decorations FAQ
What’s the correct order to decorate the Christmas tree?
Fluff → Lights → Ribbon → Large → Medium → Small → Picks → Topper.
How do I make my tree look full?
Use ribbon, picks, oversized ornaments, and filler greenery.
How many ornaments do I need to decorate the Christmas tree?
80–120 for a 6–7 ft tree • 120–200 for an 8–9 ft tree
Should my tree match my room?
No — but a coordinated theme can always elevate it.
What colors always look good?
Gold + White • Navy + Champagne • Red + Gold • Emerald + Gold